
FAQ/Guide by AileronNoir (AileronNoir@AileronNoir.com)
29 June 2003 - Version 1.4
Copyright 2003 AileronNoir
FAQ/Guide by AileronNoir (AileronNoir@AileronNoir.com)
29 June 2003 - Version 1.4
Copyright 2003 AileronNoir
Latest text only version can be found at gamefaqs.com or the latest
HTML version can be found at kolibri.aileronnoir.com
This guide can be copied to other websites only with the
authors permission, any information I'm missing can be
emailed to me for inclusion (AileronNoir@AileronNoir.com)
and I'll add it crediting you.
SECTIONS
1) Introduction
2) Storyline
3) Controls
4) Options
5) Items/Weapons/Enemies
6) Hints/How to Play
7) Cheats/Passwords
8) Walkthrough
9) Finding a copy of Kolibri
10) Similarities with Ecco the Dolphin
11) History
The first question I'm sure a lot of people are going to
have, considering the Kolibri was never a widely know of
game, is just what is Kolibri? To put it simply it's an
attempt to try something new with the old side scrolling
shooting space ship game style. Instead of a ship you
are a hummingbird fighting giant insects to save nature.
While there are a few side scrolling levels for the most
part you are free roaming solving puzzles or mazes to get
to the end of the level.
It was never widely heard of thanks to it being released
for the Sega 32x, a console released as a stop gap between
the Sega Mega Drive/Genesis and the Sega Saturn (competitor
to the Sony Playstation) which failed for various reasons
before it even really launched.
It was made by Novotrade, which you may or may not recognize
as the makers of Ecco the Dolphin, which achieved a following
during the Mega Drive/Genesis days, and now has a sequel
on the Dreamcast and Playstation 2. There are many similar
feeling themes with the Ecco the Dolphin series of games.
Kolibri, like Ecco, probably isn't for everybody. You have to
have the ability to work though very hard puzzles to enjoy
it. However I hope my hints will help people playing not to
get totally stuck (It took me 4 months playing off and on
with no help to figure out all the levels)
I started playing since I'm a big fan of the Ecco the Dolphin
games, and I've heard Kolibri mentioned by Ecco fans many times.
Since I've started playing I've become a convert and become
hooked enough to figure out the entire game with no instructions
or help, Which in itself shows how different it is to most
shoot em ups of this type - I don't usually play this type of
game. I just wish they had developed some of the elements like
the storyline more - I think it could have be even better
with the changes to the genre taken further, but that said
I still love the game.
Well if you think it's worth taking a look, there are
instructions further on about how you might get to play.
Or if you are playing it, my information should hopefully
make things a lot more fun if you are lost as to how some
things work (It took me ages to work some stuff out without
a manual) or pulling your hair out on a puzzle...
EARTH'S MIGHTIEST HERO
Earth is a living organism. Each life-form on Earth is a cell
of the greater whole. Deep inside the planet, a mysterious ancient
crystal hums, radiates and energizes Earth with its powerful
life force.
The ancient crystal is a gift from afar, Eons ago, deep in an
unknown sector of the universe, a more highly evolved living
planet exploded. The crystal with its mysterious life force
was hurled into space. It rocketed towards Earth and buried
itself deep in the planet's core.
With this new energy, the young Earth began to breathe. The
crystal was the heart that Earth needed to become alive! For
millions of years, the crystal worked beneath Earth's crust,
fueling evolution with its harmonious energies.
A twin to the crystal had also been hurled into space. This
dark crystal had been irradiated by the massive planetary
explosion. It spent ages falling through the vastness
of space, festering, pulsing and swelling with infection.
Finally, the malignant crystal sped Earthward and crashed
into the planet.
Now with room to spread, the dark crystal spewed its
malignant force into the Earth. Like the worst pestilence,
the cancerous growth invaded nature. It devoured
Earth's lifeforms, changing them into gray, diseased
shadows. Each life-form, each cell of Earth's being, became
a cancerous growth. Starved of the ancient crystal's
strength, nature's works of art sickened. Earth began to die.
EARTH CRYSTAL'S LAST GASP
Deep underground, the Earth crystal felt the death pangs.
The engulfing disease moved swiftly, nearly obliterating the
crystal's power. With its dying strength, the Earth crystal
burrowed to the surface.
At that moment, Kolibri the hummingbird flew by. Sensing
pure life, the Earth crystal infused the small bird with its
strength, Kolibri became the antibody, empowered to combat
the malignant evil.
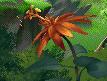
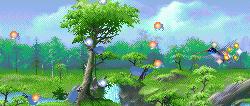
LEAVING HOME MEADOW
Kolibri's world is about to change. As the little hummer
cruises his home meadow, use the D-pad to explore with
him. Drink from the orange flower that has no other
hummingbirds defending it to start the game. While Kolibri
refreshes himself with nectar, fate steps in...
Kolibri must destroy the mutated lifeforms that infest Earth.
He must defeat the dark crystal's evil and restore the Earth
crystal's harmonious energy.
One of the Earth's smallest creature has become her
mightiest hope. But as what cost?
By default the controls are (in game);
| D-pad (Direction Pad) | Move in pressed direction (Explains itself I think) |
| A Button (Special) |
Has three possible uses;
1) It can be used in front of a pollen laden flower to drink from it, producing a health power up. (Early levels only) 2) If you find a Wall Breaker Pod you can fire one wallbreaker per wallbreaker pod picked up. Their main use is to destroy a special barrier in some levels that blocks off parts of the level (Common puzzle later on) but if you have more than one of them the spare ones can be used as a super weapon which bounces around the screen taking out everything on it. 3) If you pick up a energy field pod you can press and hold A to powerup a shield about you. You will lose the shield as soon as you release A and it takes a few seconds to charge up. Once it is in place every one of the 'sparks' will automatically attack enemies of shots about it hit you protecting you. It's great for getting through hard spots but you only get one per pod so use them wisely! |
| B Button (Fire Weapon) | Fires the weapon you currently have. The exact effect resulting depends on what weapon you have. See the Items/Weapons section for more details. Also you can hold it down for rapid fire and while held you won't change direction while moving (unless changed under options) |
| C Button (Speed Burst) | When pressed makes you move in sudden burst in the direction pressed on the d-pad. |
| Start Button | pauses game |
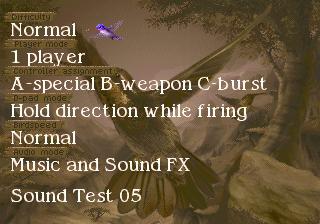
| When you start the game there are 3 options you can take | |
|---|---|

|
Start a new game (Starts a new game from the start) |
| Options (Allows you to change how the game plays) | |
| Password (Enter a password to start at a later level) Options and Password both take you to a sub menu (Press start to return the main menu when done) | |
| Options | |
|
1) Game difficulty (Easy, Normal or Hard) |
| 2) 1 or 2 players (With two players there are two Humming birds that share one screen and work together) | |
| 3) ABC button actions | |
| 4) Hold direction while firing / Change direction while firing (This controls if you want to change the direction you point if you press another direction while you are holding fire down) | |
| 5) Burst speed (fast/normal) | |
| 6) Choose to turn on or off Music and Sound Effects | |
| 7) Sound Test (Select a track with left/right and press A to play) | |
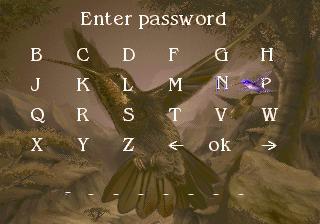
| Password | |
|
On the password screen you can enter a password you got given at the start of a level to start there rather than at the start of the game. If it is accepted you will return to the main menu and the "Start a new game" option will have the level name of the password you entered in it. |
It should be noted I don't know official names for any
of these so I'm making them up as I go.
| Good Items | |
|---|---|
Earth Crystal
 |
Gives you the power to fight at the start of the game and after that whenever you encounter it in a level constantly showers out weapon pods so it is very handy for getting the weapon you want, as you can always pick your favourite weapon by waiting long enough. |
Milestone
 |
Looks like an overgrown version of the Earth crystal. If you touch it you will see an imprint of Kolibri appear in it - this means you will restart at that point in the game if you die rather than the start of the level. However you can only save once so save carefully. |
Wall Breaker Pods
 |
In certain levels these can be found. If you pick them up you can use them to pass a barrier later in the level (Use A is fire them) |
Health Pod
 |
Looks like a black ball with two orbiting fireballs, restores one unit of health. Can be found by destroying enemies or in flowers in early levels. |
Pollen Flower
 |
Looks like any other flower but has 'pollen' coming from the tip (you'll know it when you see it). Press A in front of it and a Health Pod will fly out of it for you to grab. |
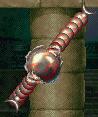
Ring
 |
When picked up surrounds Kolibri and protects you from one hit (maximum of one can be held at a time) |
Energy Field Pod
 |
Looks like a ball with a chromosome in it (Sort of like a crushed X if you don't know what a chromosome is) you can press and hold A to powerup a shield about you. You will lose the shield as soon as you release A and it takes a few seconds to charge up. Once it is in place every one of the 'sparks' will take one hit for you. It's great for getting through hard spots but you only get one per pod so use them wisely! Also note you can save them up but the number you have *isn't* saved in your password so if you die you lose them all. |
Slow-Mo Pod
 |
Looks like a bubble of water that bursts when you touch it. This slows enemy movement speed which can greatly help in avoiding incoming fire and taking out enemies. |
Hummingbirds
 |
In several early levels there are fellow hummingbirds present, they don't do anything though. |
Butterflies
 |
In several early levels there are butterflies present, they don't do anything though. |
| Bad Items | |
|---|---|
Chain Ball
 |
Red Globe with a spiky tail that spins around it. Not exactly an enemy, but I'll call it bad as it can hurt you. It's use is to break through barriers on some levels. It explodes if hit by most weapons but if hit by the weapon that sends out non honing rings, or the weapon that fires a single slow honing blue ball, it can be pushed along rather than exploded, if it is hit lightly. That can be used to push it up against a barrier before using it to destroy it by blowing it up. |
Water Drops
 |
These fall from the roof of caves - small ones do nothing but a large one will crush you. As soon as you see small ones watch out, as a large one may suddenly fall next. |
Rock Barrier
 |
These can be destroyed with either a fireball, or with a exploded chain ball, depending on the barrier to reach new areas. |
Enemy Barrier
 |
These only open when a special enemy (Spikey) passes through them, you have to follow it to them from another part of the level. |
Homing Pod
 |
Looks like a powerup but filled a darkish golden colour. Flying snake like enemies release these - they follow you around slowly, hurting you if you they hit you. |
| Weapons | |
|---|---|
Default
 |
 This is the weapon you start with. It fires a tiny
ball that goes the direction you point (non honing)
at a slow rate. Not very good but get another weapon
item for it (clear with a red wiggly line through it)
and it's rate of fire increases greatly.
This is the weapon you start with. It fires a tiny
ball that goes the direction you point (non honing)
at a slow rate. Not very good but get another weapon
item for it (clear with a red wiggly line through it)
and it's rate of fire increases greatly.
|
Laser
 |
 You get this from a see-through powerup with a
pulsating orange loop in the middle. It fires
shots that hone in on enemies automatically, it's
quite powerful and my personal favourite.
You get this from a see-through powerup with a
pulsating orange loop in the middle. It fires
shots that hone in on enemies automatically, it's
quite powerful and my personal favourite.
|
Yellow bombs
 |
 You get this from a powerup that is filled dark red.
It sends out a stream of shots that explode a few
bird lengths from you, sending out a semi circle of
smaller shot which makes it almost impossible for
anything to get past it - but it only goes one direction
at a time, so you have to be on the alert to use it well.
You get this from a powerup that is filled dark red.
It sends out a stream of shots that explode a few
bird lengths from you, sending out a semi circle of
smaller shot which makes it almost impossible for
anything to get past it - but it only goes one direction
at a time, so you have to be on the alert to use it well.
|
Fire Chain
 |
 You get this from a see-through powerup with a
blue line running through it. As soon as you get it
you will see a string of glowing balls form and string
out from you. They will automatically detach
and fire at any enemy near you before returning to you.
It has a *big* bonus of staying if you get another
weapon so you can use it with another to double your
firepower.
(Another personal favourite)
You get this from a see-through powerup with a
blue line running through it. As soon as you get it
you will see a string of glowing balls form and string
out from you. They will automatically detach
and fire at any enemy near you before returning to you.
It has a *big* bonus of staying if you get another
weapon so you can use it with another to double your
firepower.
(Another personal favourite)
|
Big Blue Ball Shot
 |
 You get this from a see-through powerup with a
silver horizontal line going across it. If you collect
a more than one of them (even if you get another
weapon in-between them) you can upgrade it to 2 or 3
homing shots at once. It decreases back from 3 to 2
and 2 to 1 if you are hurt.
You get this from a see-through powerup with a
silver horizontal line going across it. If you collect
a more than one of them (even if you get another
weapon in-between them) you can upgrade it to 2 or 3
homing shots at once. It decreases back from 3 to 2
and 2 to 1 if you are hurt.
|
Fire Rings
 |
 You get this from a see-through powerup with a
yellow circle inside it. It sends out in the direction
you face a series of rings. They don't hone in but
it has a secondary use - it can be used to push an
item in later puzzles without blowing it up before you
want it to.
You get this from a see-through powerup with a
yellow circle inside it. It sends out in the direction
you face a series of rings. They don't hone in but
it has a secondary use - it can be used to push an
item in later puzzles without blowing it up before you
want it to.
|
Blue Single Shot
 |
 You get this from a see-through powerup with a
yellow triangle in the middle. It fires a stream
of small blue balls.
Not very powerful but it can be used to push an
item in later puzzles without blowing it up before you
want it to. This has an advantage over the Fire rings
as it can push that item up and down - not just left
to right.
You get this from a see-through powerup with a
yellow triangle in the middle. It fires a stream
of small blue balls.
Not very powerful but it can be used to push an
item in later puzzles without blowing it up before you
want it to. This has an advantage over the Fire rings
as it can push that item up and down - not just left
to right.
|
Small Blue Ball Shot
 |
 You get this from a see-through powerup with a
silver ball in the middle. It's just like big
blue ball shot but smaller and they bounce off
rock balls rather than going through them.
You get this from a see-through powerup with a
silver ball in the middle. It's just like big
blue ball shot but smaller and they bounce off
rock balls rather than going through them.
|
| Enemies | |
|---|---|
Toad
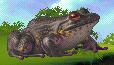 |
Can be hard to spot as it blends into the background. It can't move but isn't like other enemies as it is instant kill and impossible to escape if it gets you hooked with it's tongue. |
Chameleon
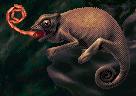 |
Just like the Toad but easier to see and with a longer range tongue. |
Wasp
 |
Fires one shot at you but also will try to fly into as well. Very common. |
Bumble Bee
 |
Fires one shot at you but also will try to fly into as well. Very common. |
Hornet
 |
Fires one shot at you but also will try to fly into as well. Very common. |
Honey Bee
 |
Fires one shot at you but also will try to fly into as well. Very common. |
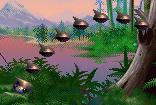
Bloat Bug
 |
Blocks your path until you destroy all the enemies in the area before it. It then chases you constantly until destroyed - releasing a health up in the middle surrounded by a ring of weapon powerups. |
Hive
 |
Small bees constantly swarm at you from inside it when you approach, destroy the hive to stop them. |
Red Beetles
 |
Moves slowly along the ground, very easy to avoid. |
Fire Spitter
 |
Can be found on walls and floors in many levels, works somewhat like a turret. However it can only fire at certain angles so shoot it down from the right place you it won't be able to hit you. |
Homicidal Flapper
 |
Zooms in from off screen and either just crosses the screen or chases after you. Try to avoid them as they often come in swarms that are too large to shoot every one of them down. |
Ball Snake
 |
Follows you about the screen firing a spread of 3 shots at you. Also sometimes releases a homing globe. Due to their length they can be hard to avoid. |
Dragonfly
 |
Hovers on screen for a bit then flies off, the main danger with them is running into them while trying to avoid something else. |
Yellow Beetle
 |
Moves slowly along the ground, very easy to avoid. |
Spinning Spider
 |
Moves backwards and forwards spinning about and shooting a spread of shots every few seconds. |
Wispy Eye
 |
Very uncommon, just hangs on screen for a second then flies off without attacking. |
Bulb Sucker
 |
Looks innocent enough until you get close. It then open and shoots out a spiked arm while trying to suck you into it. Best destroyed from a distance. If do get grabbed keep firing, you may just be lucky enough to destroy it before you get sucked inside. |
Hanging Spider
 |
Sits still until you get close then dives down on a thread that hurts you to run into. |
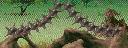
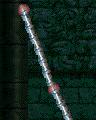
Spike Chain
 |
Follows you about the screen until destroyed, can be several different lengths. |
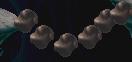
Booby Trapped Rock
 |
Slowly falls from the sky, if you shoot it a swarm of insects is released. Needless to say it's best to not shoot it if you can. |
Ants
 |
They emerge from a point in rocks and walk along the ground/walls/roof. The only danger with them is if you run into them. |
Spikey
 |
This is a special enemy that can't be attacked. It won't attack you unless you get close to it so keep your distance. You have to follow it until it passes a barrier almost every time you see it. (The barrier only opens giving you a chance to pass through when it goes through.) |
Barrier Blocker
 |
These guard certain barriers firing shots at you. You need to shoot them all to open the barrier. |
Scorpion
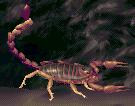 |
Looks huge but doesn't actually do much, just tries to rush you if you get close. So just shoot it from a distance. |
Giant Snake
 |
Lunges at you when you get close, just hang back and shoot to destroy it. |
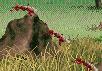
Mother Spider/Baby Spiders
 |
The mother spider walks about the level slowly laying tiny hard to see babies (look just above the mother in this picture and you can just see one.) Shoot the mother as soon as you can or you will likely accidentally run into one of the babies because you didn't see it. |
Pole Stabber
 |
Stays neatly folded up until you get close then swings out and tries to impale you. Hard to get past unless you move with perfect timing. |
Spiked Ball
 |
Held behind a shoot able barrier - just don't shoot the barrier releasing them and you'll be fine. |
Caterpillar
 |
Inches slowly along the ground, you shouldn't have any trouble with it. |
Walker
 |
Only appears in the last few levels in the game. See the walkthrough on how to deal with it. |
Amoeba
 |
Runs down the screen fast but has no ranged attack so dodge it and you'll be fine. |
How to play;
There are a few things that aren't so obvious when you first
play. Firstly Kolibri's health bar is hidden most of the
time and only shows up when you either get hurt or gain
health. When you do you will see a series of miniature
Kolibris flying about you - the number of them shows the
number of hit points you have left (up to a maximum of 4)
There are a number of different level types on Kolibri;
Starting out you are in a storyline level - there are no
enemies that hurt you, bar a toad that can eat you. The
other hummingbirds are hording all the flowers and won't
let you near them. Find the flower by itself and feed there
(Special - by default A), the screen will go dark and you
will see meteorites crashing to Earth, then crystals fly
into you from the good crystal as you are recruited to fight
against the evil crystals.
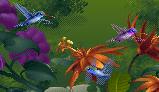
The first few levels are to get back the flowers - you need
to explore the levels and destroy all insects by the flowers
so the hummingbirds can come back to them (the flowers
get their colours back when freed) After every flower group
is freed you have completed the level.
Next you have area type level when you need to eliminate every
enemy in a section of the level before a giant bug blocking
your path becomes fightable allowing you access to the next
section.
You then have the generic scrolling levels where you just
have to follow the screen and survive all the hazards you come
across until the end of the level.
Finally we have free roaming puzzle levels where you have to
explore the level and solve puzzles to access to new areas.
They generally come in two types but there are a few other puzzles
out there but they are more rare. The first of the two types are
firstly having to find a group of Wall Breaker pods
and then finding a barrier and using them (press A) to destroy it.
The second type is pushing a Chain Ball around it with either
Fire Rings or blue single shots. If you hit it very
lightly with only one or two shots every few seconds it will
move without blowing up (hitting the tail seems to increase
the chances you will blow it up) When you get it pushed up against
a barrier, blow it up with another a stream of fast shots
destroying the barrier.
Use special items that you can get in later levels such as
Energy Fields and Wall Breakers to get through sections you find
hard to fight through.
Level Passwords:
| 1) Warning Signs | KQYZHFDM |
| 2) Rescue | BLSCGFDP |
| 3) Eruption | PQWTGFDV |
| 4) Infestation | CZWTJFDG |
| 5) Expiry | CSLFHZCS |
| 6) Metastasis | FQKJTTDY |
| 7) New Infection | SVNZTTDF |
| 8) Deep Seeding | RWMBGFDZ |
| 9) Plains Infection | ZVQVPTDN |
| 10) Terra Lesion | NXXDPTDJ |
| 11) Terra Decay | FDYDHFDR |
| 12) Cold Entrance | NCVPRTDM |
| 13) Dark Cavity | NGYGSTDF |
| 14) Dark Obstruction | BJGQRTDP |
| 15) To The Light | QYRQTTDW |
| 16) Infected Forest | PSVZCVDH |
| 17) Old World Infection | CYYRDVDX |
| 18) Penetration | GQDZBVDK |
| 19) Extraction | CVCKCVDW |
| 20) Remission | RKGYVZCN |
Introduction
Not Strictly a level but people new to the game
get lost here. Go to the flower with no humming
birds near it at the bottom to the right and feed
from it (A) to start the game running.
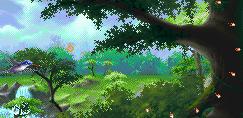
1) Warning Signs
You start near an Earth crystal - get your favourite
weapon from it and then just eliminate the enemies
holding the flowers along the bottom of the level
to clear the first level.
2) Rescue
Head up slightly and grab a ring then head
down and clear enemies off the flowers as you
go. Then go across the bottom and up the left side
clearing enemies as you go. Once you get all the
flowers cleared you will exit the level.
3) Eruption
This level is divided into a series of areas with
enemies then a Bloat Bug that blocks your path until
you destroy all the enemies in the previous area.
Just go up/down and left/right shooting enemies - when
they are all gone the Bloat Bug will fly at you and you will
be able to fight it - destroy it to get access to the
next level. Repeat the process until you get to
the end of the level (fly into the arrows against
the right screen).
4) Infestation
This level auto scrolls to the right - you exit the
level when it reaches the far right. You just have
to survive to get there through many waves of enemies.
5) Expiry
This is the first puzzle type level in the game. Start
by flying from the right of the level where you start
to the left (be careful not to get pulled down by the
current going down by the waterfall half way) At the
far left you will find a Slow-Mo Pod and a group of
Wall Breaker Pods. Collect the pods and then
head right back to the waterfall and head down it. At
the bottom there is a Earth crystal and an air current
blowing from the left. Head into it and burst with C
to fight through it's middle (it's hard but possible -
the hardest thing is avoiding the chameleon near the
passage top. Once though head down and left then press
A next to the barrier to use the Wall Breaker to break
through and exit the level. (Just below the barrier
for the exit is some Energy Field Pods if you want to
get them.)
6) Metastasis
This level is like 'Infestation', but more complicated
as the screen goes up and down as well as forwards and
back as it scrolls about the level. There are several
toads and other new dangers to avoid as you travel about.
Practice will get you through to the end of the level.
7) New Infection
Fly down at the first chance you get and head down
avoiding the toad and chameleon, keep going till you hit the
bottom and grab a ring. Then follow the bottom to the
right, up slightly then continue as far right as you
can go. You will see a group of Wall Breakers at the bottom
just below a series of water drops falling from the
roof. Watch out! There is a large one that falls right
through the Wall Breaker Pods, dodge it and get the pods.
Return to near the start where you first headed down and
this time head right. Follow the upper roof until you
see a barrier - press A to use the Wall Breakers to break
through it and exit the level.
8) Deep Seeding
Head up and to the right. Avoid the plant and get whatever
weapon you want from the Earth crystal. Continue up and
shoot through the barrier to get the ring. Don't pass
the chameleon yet - head right just below it until you
find the Wall Breaker Pods and then return to here. To get past
the chameleon you need to move to just out of it's range
so it will try to it you, and miss - then quickly zoom
past while it's tongue is rolling back. There is a Slow-Mo
Pod to the left and some Energy Field Pods above if you
want them. Then head to the right and be very careful
once you pass the toad - water drops will start to fall
including a few large ones you must avoid. Dodge through
them and at the end of the passage go down, use the Wall
Breakers to pass the barrier. Then head right, and up to
the very top to exit the level.
9) Plains Infection
This level is a return to simple side scrolling action. Just
grab a weapon at the Earth crystal at the start and grab all
the rings you see to help you survive until the end.
10) Terra Lesion
A return to the area based level type of play. Wipe all the
enemies out as you proceed so you can fight the Bloat Bug and
access the next area. Repeat until you reach the end.
11) Terra Decay
This level is free roaming but you must stick with a mission
to complete the level. Follow the enemy (Spikey) you see in
front of you at the start of the level (you can't hurt him)
through the level, when he gets to the end the entrance will
open for him. Use that opportunity to follow him through and
exit the level.
12) Cold Entrance
A return to the puzzle solving levels. Head right and shoot
the enemies to lower the barrier so you can grab the Wall
Breaker Pods. Head back left and down the passage you just
passed over. Dodge the rock moving backwards and forwards
across the passage, get any weapon you want from the Earth
crystal. Then continue down, at the bottom head left. Use
the Wall Breakers to destroy the barrier, you will see a
bouncing red rock just beyond it - shoot it to push it into
the next barrier destroying it. Then head up to the exit.
13) Dark Cavity
Head left and destroy the scorpion, grab a ring from above
then continue left. Destroy the enemies to drop the barrier
you can find a Slow-Mo Pod below it. Continue left, then
rush up through the gaps in the rocks avoiding the water
drops. Grab the shield at the top left of the screen. Then
head to the right at the top then down (grab the Energy Field
Pod behind one of the spiders if you want) and then right
again. Head up avoiding the water drops then head left.
Destroy the enemies to bring down the barrier and get the
Wall Breaker Pods (plus the Energy Field Pods with them if
you want) then retrace your steps back right.
Down, right and up - look carefully behind a spider on the
right wall, it is guarding a barrier. Use the Wall Breakers
to destroy the barrier and continue right past it into another
passage, follow that one right to exit the level.
14) Dark Obstruction
Welcome to one of the largest levels which is thankfully
make easier by the appearance of the first restart points.
To start the level you are faced with a new puzzle skill
to learn. Just below your starting point you will see a
Chain Ball (See the bad item section for more information
on this type of puzzle) Pick your weapon of choice for this
puzzle from the good crystal to the right,
Then push the Chain Ball up against the barrier and hit
it fast to blow it up destroying the barrier. Fly to the
left into the passage behind it, (grab the Energy Field
Pods if you want). Continue left shooting your way through
three barriers. You will then come into a chamber with a
Earth crystal, a group of Wall Breaker Pods under a barrier
surrounded by enemies and an up flowing a air current at
the far side. Needless to say fight your way through the
enemies get the Wall Breaker Pods and then return to the
starting area. Head down avoiding the chameleons and then
shoot the enemies on the barrier to get through. You'll
see a second barrier beyond that and a Milestone, save
and then use the Wall Breakers to break through the lower
barrier. Head downwards, avoid the water drops when they
start falling and make your way through the rocks. At the
bottom you will see another of the Chain Balls, you can use
it to get into two small areas at the bottom with Energy
Fields in them but it's not needed to complete the level.
Head left and follow the passage up/left until you reach a
passage that consists of a narrow space between two narrow
moving lines. Contact with them means damage, you have to
watch their motion and at the right instant go through to make
it. On the other side is another Milestone - use it
then head up. You will see a structure that looks somewhat
like a strand of DNA, what you have to do is time your
passage up to pass through the gap down the middle of it
that opens as it moves without touching the sides. Once
you get to the top you can get an Energy Field Pod from the
left then head into the air current to the right. Avoid
the rocks moving up and down, at the end head up. Then
head left against the weak current, then up. The next
chamber has an Earth crystal and two chameleons with Wall
Breakers below them - you don't have to go past them though,
there are more Wall Breakers on the roof of the cavern.
After you have collected some Wall Breakers continue left,
and let yourself be sucked down by the air current. You
will see you are on top of the 'DNA strand', head right
again with the current but this time at the end go down
rather than up. Watch the motion of the 'plant' and dive
though the gap made when it moves, repeat with the two
plants below it and you'll find your self back by the
'string' cave entrance. Head down and to the right retracing
your path back towards Chain Ball. On the far side are two
'plants' that block your path, however their motion opens
a gap between then every swing, you have to dart through
that gap. Then use the wall breakers to destroy the barrier
behind them, continue right to exit the level.
15) To The Light
As the name suggests we are almost through the ant nest.
Head to the right, avoiding the moving rocks. When you
get to a shoot able barrier, shoot through it and go into the
chamber behind it to get some Wall Breakers and some Energy
Field Pods, exit the chamber and head up the passage where the
barrier was. Head left past the Earth crystal and into
the passage at the left avoiding the moving rocks. Continue
up and back right following the passage till you get to
a barrier, use the Wall Breakers to break through it. Retrace
your steps to where you got the first lot of Wal Breakers
Pods and collect a new lot, return to where the barrier was and
continue up the passage and use the Wall Breakers to destroy
the next barrier. Continue along the path of the passage as
it loops about - (up and down near the roof). When you get
to a fork in the passages, continue right along the top of
level. Head down at the end until you reach a barrier,
retrace your steps back up and take the first left - there
are Wall Breaker Pods in there. Use them to destroy the
barrier and continue down, shoot though the next barrier
then use the save point. Continue left and down to the Earth
crystal. Continue on and get the ring. From here you
will see a series of barriers shut as you continue through
the passage and a group of enemies start to follow you as
you near those barriers. Go through the passage slow until
the enemies on the wall detach and go after you, then dart
quickly past the barrier so it shuts and leaves the enemies
on the other side. It takes a bit of work to get the it
just right but get through them all and you will be through
the level.
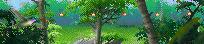
16) Infected Forest
Just a side scrolling shooting level to make a break
from all the puzzle solving. Shoot your way to the end
to exit the level. Note the ruins at the end, you are
getting close to the main hive of all the evil insects.
17) Old World Infection
You are now in the start of the ruins shooting your way to
the end again. Watch the ruins grow larger and larger as
you continue, almost there.
18) Penetration
You've reached the hive entrance, at the start below you is
an Earth crystal and above is a Chain Ball. Firstly head
forwards slowly and eliminate the Giant Snakes. You will then
see a barrier in the floor and just past that in the roof a
shoot able barrier holding back lots of bouncing spiky things.
Don't shoot the shoot able barrier or you have just made
life hard for yourself. You will see a Spikey fly down and
through the barrier - just ignore him for now and return to
the start. You have to use a weapon to push the Chain Ball
to the floor barrier and use it to blow it up. That is easier
said than done. Fly to the top left corner and then slowly
push it down and along with the blue single shot weapon,
you need to be very careful or you will have to try a LOT
to get it done. Once you get through, head down and destroy
the Giant Snake, quickly follow the enemy through the barrier
as it opens for him to exit the level.
19) Extraction
Head right avoiding the bar that swings at you, head straight
down until you reach the bottom and head right past the worm,
get a ring and grab the Wall Breaker Pods then head back left.
You will find how you came in is now blocked, head up and take
the upper passage, head up then go right as soon as you can.
At the end destroy the barrier with the Wall Breakers and
continue down/right. Continue right for a chamber with rings
and Energy Field Pods. Head back left from there and take
the first up passage. Use the save point to the left and
continue up. Don't get sucked into the left current instead
head up and follow the odd looking Walker enemy. Fire
everything you have into the Walker enemy while avoiding the
shots he fires at you every few seconds. Once the legs blow off
the 'disc' will fly at you, shoot it down (while avoiding
being hit) to reveal a Wall Breaker Pod so you can pass the barrier
at the end of the passage. Continue along the passage to
exit to the final level.
20) Remission
The final level of the game and huge one as well.
Head straight right as far as you can, then down at the
butterflies, left at the bottom and then up. You will see
a Walker enemy. I find you need a slightly different
technique than in Extraction to get through here though.
Ignore the first one and hang back from it, you will see a
second one appear behind you in a few seconds. (You may
find it useful to wait in the area the first appeared
moving backwards and forwards to check on the first's
progress (It won't move off screen) Unleash all
your fire into the second one - this will slow it down. (If
you don't it catches up with the first and crushes you
between them) Wait until the first explodes of it's own
free will while pushing the second back with your fire.
Once it does quickly dart past the disc and shoot it down
to get the Wall Breaker Pod needed to pass the barrier ahead.
(Make good use of the health Pods released as walkers
enemies are destroyed) The last bit with both of the
enemies very close may seem impossible but with a lot of
practice and getting good at predicting where the enemies
will shoot will get you through. Also once the first enemy
blows up you gain access to the chamber ahead with many
rings - they can save your life! Once you are through the
barrier with the Wall Breakers, head down then right. You
will see enemies on the walls waiting for you like in 'To
The Light' - once they start following rush past them fast
and keep going until they are off screen (they will stop
following you then) You will be in a chamber with a Earth
crystal, head up as far as you can. Then straight left
at the end go up and get the Wall Breaker Pods near the
roof and then use the save point to the right. Retrace your
steps back left, down and right to near the second
caterpillar. Go up the shaft and use the Wall Breakers to
pass the barrier to the right. Go along the shaft, a ball
will fall from the ceiling and chase you. Dash as soon as
you pass it's place in the roof and you should out run it.
Continue along the passage to the right. When you reach an
open area, head left and then down/left (The left/up area
has Energy Field Pods and a Milestone in it) When you get
to the area with the Earth crystal head right along the
lower passage. You end up in a chamber with a globe containing
a health Pod. I'm yet to figure out how to get it out of the
globe though so ignore it and get the Wall Breaker Pods from
beyond it. Retrace your step back past the Earth crystal,
up/right until you get to the big chamber, then head down/right
and use the Wall Breakers to pass the barrier. Continue left,
you will pass by two passages with Earth crystals, then a barrier
will close behind you. Head up and you will see the enemy you can't
attack again, follow it until you pass the barrier that
opens for it. To the left is a Milestone and rings.
Head up and then left, take the passage up. Then left and
up again. Up a bit further you will find a large chamber
with another Milestone. Go back to the right and continue
up to the top then head left then up and left again. At the
far end you will find a group of Wall Breakers, get them and
return to the chamber with the Milestone. Save your game
then head up past the plant, you will have to outrun a ball
rolling behind you. Just dart (C) as fast as you can and you
should make it. Continue left then up avoiding the arms
that swing at you. Get the ring up the top to the right
and continue up. To the right is three ring behind an
lot of bouncy spikes behind a shoot able barrier. Continue up,
and use the Wall Breakers to pass the barrier. You will then
have to make your way through a chamber with lots of spike
arms swinging at you - I find just going fast often works
here. Once you are through no shooting! You will enter an
area with hundreds of spiked balls above you held back by
a shoot able barrier - you don't want to unleash them! You
then face a few enemies then another spike trap so be
careful shooting. After that you head up a shaft with a
falling rock. At the top you go right and after a few more
enemies is a Milestone. Continue up after saving get
your favourite weapon from the Earth crystal beyond it and
prepare to fight the final boss!
The final boss chamber has several small areas off from
it with lots of rings - they are essential to get through
the different boss forms alive (get one EVERY time you
lose a ring.) The forms are;
1) A wall of 'guns' that fire horizontally only, just take
out one gun and stay in the gap created to easily pick off
the rest of the guns. Once they are all gone the wall behind
them will blow up and you can fight stage two.
2) You will first have to fight your way past a few bees.
You will then see a wall of guns like before except there
are only three 'guns' and they fire shots that break into
a lot of small ones a short distance after firing (kind of
like one of your weapons except that you can shoot those
shots down.), I find that if you hug the bottom or top
and fly below the lowest/highest gun there is an area you can
sit and have all the shots miss you bar a few you can shoot
down. Use that to shoot down one gun and from there head
up/down depending on if you started at the top or bottom
and kill all the guns to get to stage three.
3) This looks like a ball with Humming birds attached by
chains to it. You have to shoot them off one by one while
avoiding all the shots from them (of which there are a few
types). I find a simple up/down motion often works. Once
all the hummingbirds are gone shoot the central sphere to
win the game. Congratulations you've saved the world!
Since the Sega 32X and Kolibri are quite old now there is
no chance of finding them in shops. That leaves two
possible ways of playing it;
1) You can pick up a copy of Kolibri and a Sega Genesis/
Mega Drive and the 32x expansion module off ebay.com with
a bit of work - you most likely will have to buy the game
and the 32x separately and they sometimes are hard to
come across. (I'm trying for a copy this way now but
thanks to many copies not having a manual or auctions
not being open to people outside the US I've not found
anything suitable so far)
2) The second way you can get to play Kolibri is with what
is called an Emulator. It's a program that simulates the
hardware of the 32x so 32x games can be played on a pc.
The emulator that I prefer to use is called Gens. It can
be downloaded from http://gens.consolemul.com/ You should
note though that it requires a little technical knowledge
like how to download and unzip a file to setup Gens though.
Also even though the emulation itself is legal. Getting
a copy of the data from the game cartridge (called a ROM)
downloaded from the net is of questionable legality -
on paper at least it may be legal if you own the actual 32x
cartridge but that's not been proven. If you still want to
run Kolibri you need to obtain the 32x BIOS files for Gens
(You don't need to know too much about what they do, other
than they are needed and again like the ROM they are of
questionable legality. Once you have Gens installed and
configured with the BIOS files you can open a copy of the
Kolibri ROM with it and play. (A gamepad for your pc is
recommended) I can't provide you with links to the ROM and
BIOS files though due to legal issues, if you want to obtain
them various internet websites may have them, all you
can do is search for them.
10) Similarities with Ecco the Dolphin
Kolibri was made by Novotrade (Now called Appaloosa) who also
made the Ecco the Dolphin series of video games. I've noticed
many things in Kolibri that either remind me of something in
an Ecco game or are very similar themed. (Warning possible
spoilers here if you've not played through the games) n.b.
I'm talking about the Mega Drive/Genesis/Sega CD/Mega CD Ecco
games here - not the Dreamcast/PS2 or any other versions of
the games.
- Beautiful nature settings and natural creatures feature
heavily in both Kolibri and Ecco.
- The style of puzzles in Ecco and Kolibri that some love and
others hate are almost identical.
- Both Ecco and Kolibri feature similar soothing music styles
(well I think at least - some people dislike both lots of music.)
- In ecco there is a creature the Asterite that looks like
a strand of DNA, in one point in 'Ecco: The Tides of Time' you
must swim through it's center without touching the sides. In
Kolibri their is a DNA like object you must pass exactly the
same way.
- In both Ecco and Kolibri in some passages there are rows of
rocks that from move side to side of the passage, that you
must dodge.
- The first level in Ecco (The first game) and in Kolibri is
just to show the opening story. There are lots of creatures
to look at but no real puzzles to solve or enemies to face,
just an action you have to do. That sets off the event that
the storyline revolves about.
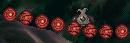
- In the 'Dark Future' levels of 'Ecco: The Tides of Time'
there is an Amoeba like enemy. A logo at the start of
Kolibri features a very similar looking Amoeba which also
features as an enemy later in the game.
- In both Ecco and Kolibri in the credits after you beat the
game you thanked for playing the game with almost the exact
same sentence.
The 'Pole Stabber' enemy in Kolibri appears in the Vortex Hive
levels of the Ecco: The Tides of Time BETA version (Not the final
retail.)
In both Ecco and Kolibri the earth/oceans are described as being
selfaware/alive (in Ecco it's in the good future).
They both feature mysterious crystals. In Kolibri the Earth/Evil
Crystal, in Ecco the Glyphs.
That's all I've noticed so far - if anybody has noticed any
other similarities please email me.
| 29 June 2003 (V 1.4) | Using my newly purchased copy of the game with manual, updated the storyline section to the full manual story. Added in the real names of several items and made other misc updates. |
| 8 June 2003 (V 1.3) | Completed enemy listing, fixed several mistakes in the weapons listing and made a few other misc changes. Completed initial work on the HTML version. |
| 29 May 2003 (V 1.1) | Added in a few details about items and added in a separate section for comparing Kolibri to Ecco games. |
| 25 May 2003 (V 1.0) | Completed Walkthrough |
| 19 May 2003 (V 0.8) | First public release, added start of walkthrough. |
| 18 May 2003 (V 0.7) | Initial version |